> ## Documentation Index
> Fetch the complete documentation index at: https://docs.webdock.dev/llms.txt
> Use this file to discover all available pages before exploring further.
# Create the first operator
> Provision a fresh installation's initial operator and Console OAuth client, then complete real password and MFA setup.
These instructions target `v0.1.0-alpha.1`. Use the matching source revision and verified release artifacts. Setup is an offline operation; application startup does not provision an administrator.
Run this once after the [offline database installation and empty plugin-state initialization](/developers/self-hosting). The command creates a local operator, its explicit Console identity mapping and a confidential OAuth client. It creates no login session, authenticator secret, backup codes, customer, provider account or Mail instance.
This procedure initializes the native Auth foundation in `apps/control-plane`, served through `apps/auth`, and the Console client used by `apps/console`. It also precedes a configured Clerk installation: finish local setup first, then follow [authentication adapters](/developers/auth-adapters) for explicit external-subject mappings. This command never links accounts by email or replaces existing identities.
## Open the private browser setup
Use the dedicated `webdock_offline_migrate` database login created by the installer, through `DATABASE_URL_UNPOOLED`. Keep this credential offline. Remote connections require `DATABASE_CA_CERT`. Set the exact canonical `BETTER_AUTH_URL`, `WEBDOCK_STUDIO_ORIGIN` and `WEBDOCK_CONSOLE_ORIGIN` in this command's environment before starting. These three origins must be distinct; use HTTPS except for explicit loopback development with a loopback database.
Run the command on the same machine as your browser. Pass the exact `host:port/database` and a new private output filename:
```sh theme={null}
umask 077
npm run setup:admin -- db.example.com:5432/webdock /private/initial-operator-secrets.json
```
Open the private `http://127.0.0.1:…/#…` link printed in the terminal. Treat the entire link as a setup credential. The random capability stays in the URL fragment, is removed from the address bar when the page loads, and authorizes only this temporary local session. The command always binds to `127.0.0.1`; there is no public setup route or configurable public bind address. The session expires after ten minutes. An optional final argument sets an expiry of 60–900 seconds.
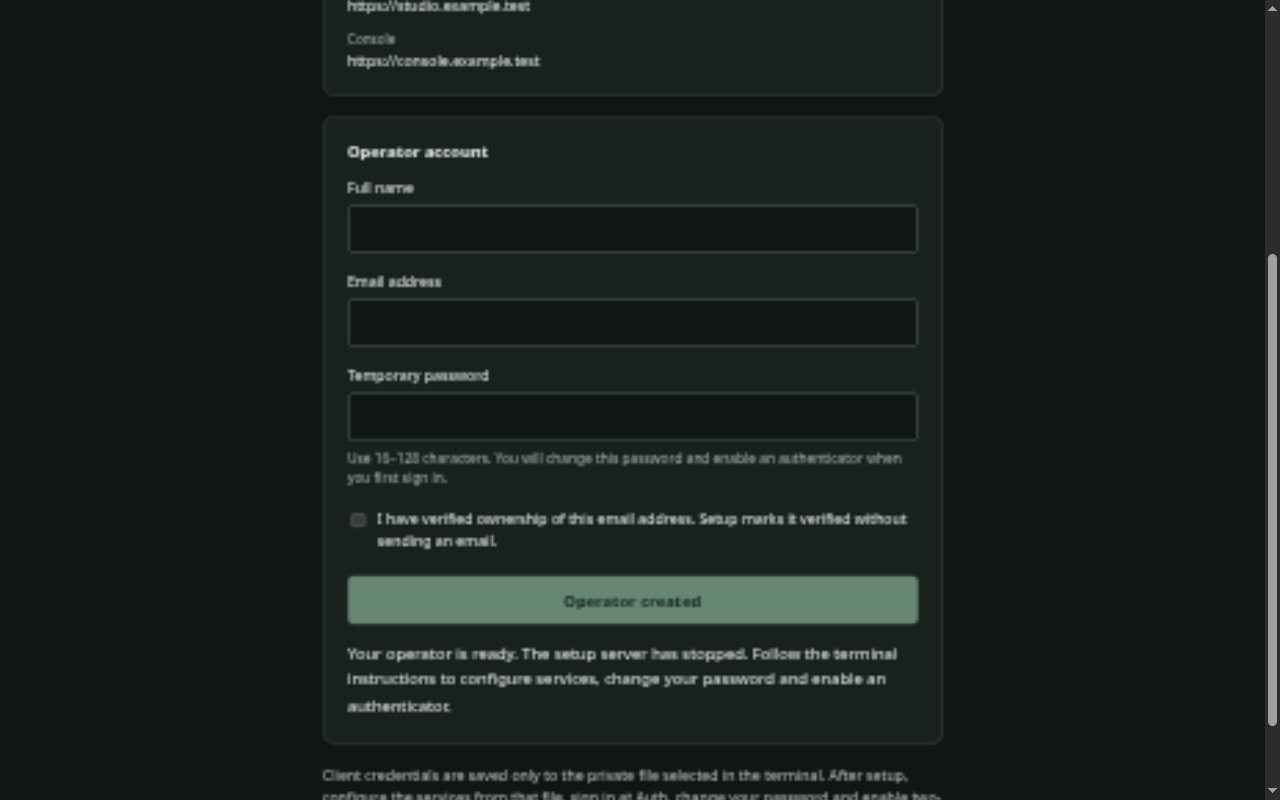
The form shows the configured origins without allowing changes. Enter your name, email and a unique temporary password of 16–128 characters, and confirm that you have verified ownership of the address. Provisioning marks that address verified without sending a verification email. Unset `WEBDOCK_INITIAL_OPERATOR_PASSWORD` when using the browser form.
The server accepts one submission at a time and stops after success or an uncertain commit. Client credentials never appear in the browser response: they go exclusively to the selected output file, created with mode `0600` without overwriting an existing file or following a symlink. The terminal reports only record IDs and a metadata checksum. After success, continue with application service configuration and real security setup below. If a connection closes during submission, check the terminal and private output before retrying.
The following capture shows a successful local test with example origins. Account fields are cleared after creation; credentials remain in the private output file.
 ## Use private JSON input instead
Use the dedicated `webdock_offline_migrate` database login created by the installer, through `DATABASE_URL_UNPOOLED`. Keep this credential offline. Remote connections require `DATABASE_CA_CERT`. The command takes the exact `host:port/database` separately and refuses a different target or a runtime/superuser login.
Choose three distinct canonical origins before provisioning: Auth, the Studio compatibility protocol, and Console. The callback stays on the Studio protocol origin. Do not substitute the Console origin in OAuth callbacks, issuer settings or MCP audiences.
Set `BETTER_AUTH_URL`, `WEBDOCK_STUDIO_ORIGIN` and `WEBDOCK_CONSOLE_ORIGIN` in the private command environment. They must exactly match the input. HTTPS is required except for explicit loopback development with a loopback database.
```sh theme={null}
umask 077
cat > initial-operator.json <<'JSON'
{
"email": "operator@example.com",
"name": "Initial operator",
"authOrigin": "https://auth.example.com",
"studioOrigin": "https://studio.example.com",
"consoleOrigin": "https://console.example.com"
}
JSON
```
Use an address whose ownership you have verified. Offline provisioning marks that address verified; it does not send a verification email. Supply a unique temporary password of 16–128 characters either as `password` in this private JSON file or through `WEBDOCK_INITIAL_OPERATOR_PASSWORD`, never both. For an interactive shell, avoid putting the password in command history:
```sh theme={null}
read -rs WEBDOCK_INITIAL_OPERATOR_PASSWORD
export WEBDOCK_INITIAL_OPERATOR_PASSWORD
bun --no-env-file tools/migrations/operator.ts \
db.example.com:5432/webdock \
initial-operator.json \
initial-operator-secrets.json
unset WEBDOCK_INITIAL_OPERATOR_PASSWORD
```
To use the migration image instead, first replace the bootstrap administrator URL in `migrator.env` with the dedicated offline migrator URL, remove the empty-database bootstrap settings, and include the same canonical origins/password configuration. The image's normal entrypoint runs schema installation, so override it explicitly for this command. Mount a private input/output directory owned by the selected container user:
```sh theme={null}
docker compose -f deploy/compose/compose.core.yaml --profile migration run --rm \
--entrypoint bun --user "$(id -u):$(id -g)" \
--volume "$PWD/private-setup:/setup" migrate \
--no-env-file tools/migrations/operator.ts db.example.com:5432/webdock \
/setup/initial-operator.json /setup/initial-operator-secrets.json
```
The input must be owned by the current OS user and have no group/other permissions. Symlinks are refused. The output is created exclusively with mode `0600`; an existing path is never overwritten. Standard output contains only record IDs, a metadata checksum and the setup-required flag.
The command refuses existing operators, earlier bootstrap audit records, an existing identity with that email, or existing OAuth applications. It never upgrades an existing user, rebinds a client or repairs a previous installation automatically. Other existing users remain unchanged.
## Configure the application services
After a successful command, retain the private output in your secret-management system. Its `environment` object contains the issuer and canonical origins, matching `WEBDOCK_SSO_CLIENT_ID` / `WEBDOCK_STUDIO_CLIENT_ID`, `WEBDOCK_SSO_CLIENT_SECRET` and a separate `WEBDOCK_SSO_COOKIE_SECRET`. Apply these to the API runtime configuration. Do not expose this file in public build arguments, browser bundles or source control.
Configure the Auth and Console UI origins and their API connection separately, following the deployment configuration. Complete the runtime database roles, context signing key, Auth signing secret, trusted ingress and HTTPS configuration before starting services. The initial-operator command does not create DNS, certificates, reverse-proxy routes or deploy containers. The Console client uses the exact registered paths:
| Setting | Value |
| - | - |
| Issuer | Auth origin plus `/api/auth` |
| Callback | Studio protocol origin plus `/api/sso/callback` |
| Logout return | Studio protocol origin plus `/login` |
| Client authentication | `client_secret_post` |
| Authorization | Authorization code with PKCE |
The private output uses `status: "verify-command-result"`: only the command's successful exit confirms the database commit. If it reports an uncertain commit, retain the file and inspect the printed/recorded IDs and bootstrap metadata before retrying. Do not delete or replace a possibly active client to repeat setup.
## Complete real security setup
1. Open the Auth origin at `/sign-in` directly. Sign in with the initial email and temporary password.
2. On `/account`, change the temporary password to a unique password only you know.
3. Enable the authenticator using that password, scan the displayed QR code in your authenticator, save the recovery codes privately and verify a current code.
4. Open the Console origin. Its normal login flow uses the registered Studio protocol callback. Operator authorization remains unavailable until password setup and MFA enrollment are complete.
No SQL edit to `twoFactorEnabled`, manual session insertion or synthetic cookie is part of this flow. Existing authorization rechecks the current native user, session and binding. Fresh setup uses your verified operator address as the default support address and disables the retained CMS setting unless those settings were already supplied. Configure a working system-authentication email transport and your own explicit `SMTP_FROM` for invitations and password recovery; customer Mail installation is independent of that transport. You can complete setup with all optional product modules disabled. Enabling a product later does not grant its permissions or provision resources.
## Verification boundary
The repository's opt-in disposable PostgreSQL test covers the offline command and real Auth password-change, MFA and OAuth handlers. It does not deploy or certify your DNS, TLS, reverse proxy or browser UI build. Validate those deployment-specific routes before exposing the installation. Review [installation modules](/developers/modules) before enabling products or assigning workers.
This documentation is built and hosted on [Mintlify](https://mintlify.com), a developer documentation platform.
## Use private JSON input instead
Use the dedicated `webdock_offline_migrate` database login created by the installer, through `DATABASE_URL_UNPOOLED`. Keep this credential offline. Remote connections require `DATABASE_CA_CERT`. The command takes the exact `host:port/database` separately and refuses a different target or a runtime/superuser login.
Choose three distinct canonical origins before provisioning: Auth, the Studio compatibility protocol, and Console. The callback stays on the Studio protocol origin. Do not substitute the Console origin in OAuth callbacks, issuer settings or MCP audiences.
Set `BETTER_AUTH_URL`, `WEBDOCK_STUDIO_ORIGIN` and `WEBDOCK_CONSOLE_ORIGIN` in the private command environment. They must exactly match the input. HTTPS is required except for explicit loopback development with a loopback database.
```sh theme={null}
umask 077
cat > initial-operator.json <<'JSON'
{
"email": "operator@example.com",
"name": "Initial operator",
"authOrigin": "https://auth.example.com",
"studioOrigin": "https://studio.example.com",
"consoleOrigin": "https://console.example.com"
}
JSON
```
Use an address whose ownership you have verified. Offline provisioning marks that address verified; it does not send a verification email. Supply a unique temporary password of 16–128 characters either as `password` in this private JSON file or through `WEBDOCK_INITIAL_OPERATOR_PASSWORD`, never both. For an interactive shell, avoid putting the password in command history:
```sh theme={null}
read -rs WEBDOCK_INITIAL_OPERATOR_PASSWORD
export WEBDOCK_INITIAL_OPERATOR_PASSWORD
bun --no-env-file tools/migrations/operator.ts \
db.example.com:5432/webdock \
initial-operator.json \
initial-operator-secrets.json
unset WEBDOCK_INITIAL_OPERATOR_PASSWORD
```
To use the migration image instead, first replace the bootstrap administrator URL in `migrator.env` with the dedicated offline migrator URL, remove the empty-database bootstrap settings, and include the same canonical origins/password configuration. The image's normal entrypoint runs schema installation, so override it explicitly for this command. Mount a private input/output directory owned by the selected container user:
```sh theme={null}
docker compose -f deploy/compose/compose.core.yaml --profile migration run --rm \
--entrypoint bun --user "$(id -u):$(id -g)" \
--volume "$PWD/private-setup:/setup" migrate \
--no-env-file tools/migrations/operator.ts db.example.com:5432/webdock \
/setup/initial-operator.json /setup/initial-operator-secrets.json
```
The input must be owned by the current OS user and have no group/other permissions. Symlinks are refused. The output is created exclusively with mode `0600`; an existing path is never overwritten. Standard output contains only record IDs, a metadata checksum and the setup-required flag.
The command refuses existing operators, earlier bootstrap audit records, an existing identity with that email, or existing OAuth applications. It never upgrades an existing user, rebinds a client or repairs a previous installation automatically. Other existing users remain unchanged.
## Configure the application services
After a successful command, retain the private output in your secret-management system. Its `environment` object contains the issuer and canonical origins, matching `WEBDOCK_SSO_CLIENT_ID` / `WEBDOCK_STUDIO_CLIENT_ID`, `WEBDOCK_SSO_CLIENT_SECRET` and a separate `WEBDOCK_SSO_COOKIE_SECRET`. Apply these to the API runtime configuration. Do not expose this file in public build arguments, browser bundles or source control.
Configure the Auth and Console UI origins and their API connection separately, following the deployment configuration. Complete the runtime database roles, context signing key, Auth signing secret, trusted ingress and HTTPS configuration before starting services. The initial-operator command does not create DNS, certificates, reverse-proxy routes or deploy containers. The Console client uses the exact registered paths:
| Setting | Value |
| - | - |
| Issuer | Auth origin plus `/api/auth` |
| Callback | Studio protocol origin plus `/api/sso/callback` |
| Logout return | Studio protocol origin plus `/login` |
| Client authentication | `client_secret_post` |
| Authorization | Authorization code with PKCE |
The private output uses `status: "verify-command-result"`: only the command's successful exit confirms the database commit. If it reports an uncertain commit, retain the file and inspect the printed/recorded IDs and bootstrap metadata before retrying. Do not delete or replace a possibly active client to repeat setup.
## Complete real security setup
1. Open the Auth origin at `/sign-in` directly. Sign in with the initial email and temporary password.
2. On `/account`, change the temporary password to a unique password only you know.
3. Enable the authenticator using that password, scan the displayed QR code in your authenticator, save the recovery codes privately and verify a current code.
4. Open the Console origin. Its normal login flow uses the registered Studio protocol callback. Operator authorization remains unavailable until password setup and MFA enrollment are complete.
No SQL edit to `twoFactorEnabled`, manual session insertion or synthetic cookie is part of this flow. Existing authorization rechecks the current native user, session and binding. Fresh setup uses your verified operator address as the default support address and disables the retained CMS setting unless those settings were already supplied. Configure a working system-authentication email transport and your own explicit `SMTP_FROM` for invitations and password recovery; customer Mail installation is independent of that transport. You can complete setup with all optional product modules disabled. Enabling a product later does not grant its permissions or provision resources.
## Verification boundary
The repository's opt-in disposable PostgreSQL test covers the offline command and real Auth password-change, MFA and OAuth handlers. It does not deploy or certify your DNS, TLS, reverse proxy or browser UI build. Validate those deployment-specific routes before exposing the installation. Review [installation modules](/developers/modules) before enabling products or assigning workers.
This documentation is built and hosted on [Mintlify](https://mintlify.com), a developer documentation platform.